Appendix
Glossary of terms
- API - application programming interface.
- Card holder - the owner of a credit or debit card.
- Cashier - operator of the Sale System.
- CHD - cardholder data. Personally identifiable information associated with a person who has a credit or debit card.
- JSON - JavaScript object notation.
- MAC - message authentication code.
- Merchant - a business entity which can accept payments.
- Payment - a request sent from a
Sale Systemto aPOI Systemto perform an operation on aCard holderscard. - Payment receipt - receipt generated by the
POI Terminalwhich contains information about the payment - PIN - personal identification number.
- POI - point of interaction.
- POI System - system which co-ordinates communication between a Sale System and POI Terminal. i.e. DataMesh Unify.
- POI Terminal - the physical PIN entry device which processes the card payment. i.e. DataMesh Satellite.
- POS - point of sale.
- Sale - a sale, created by a
Cashieron aSale System, with associatedSale Items. A Sale may be paid with one or morePayments. - Sale item - a item sold to a card holder as a part of a sale.
- Sale receipt - the receipt generated by the
Sale Systemwhich contains all sale information. ThePayment receiptmay be embedded into theSale receipt - Sale system - the system used to process merchant sales. The POS.
- Satellite app - the DataMesh payment application
- Unify - the DataMesh payment switch
- UUID - universally unique identifier.
Cloud API - Migrating ProtocolVersion 3.1 to 3.1-dmg
The DataMesh API supports two versions.
- "3.1" is based on the Nexo 3.1 standard
- "3.1-dmg" is "3.1" with additional fields added by DataMesh which are outside the Nexo standard (e.g. surcharge)
Breaking changes when moving from "3.1" to "3.1-dmg"
- MessageHeader.ProtocolVersion should be set to "3.1-dmg"
- Tip amount is now present in PaymentResponse.PaymentResult.AmountsResp.TipAmount.
- Surchage amount is now present in PaymentResponse.PaymentResult.AmountsResp.SurchargeAmount.
PaymentResponse.PaymentResult.PaymentReceiptis now an array of receipts. This was a single object in "3.1"- For a successful payment, the acquirer STAN is returned in
PaymentResponse.PaymentResult.PaymentAcquirerData.STAN. - For a successful payment, the acquirer RRN is returned in
PaymentResponse.PaymentResult.PaymentAcquirerData.RRN. - POS should support the "3.1-dmg"
mandatory features checklist- Include product data in each payment request
- Support for purchase and refund payment types
- Additional fields will be added to the message specification over time. To ensure forwards compatibility the Sale System must ignore when extra objects and fields are present in response messages. This includes valid MAC handling in the SecurityTrailer.
- Support for TLS and other security requirements
- Settings user interface
- Payments user interface which handles the
Initial UI,Final UI, andcancelling a sale in progress - Handle error scenarios as outlined in error handling
- Ensure Sale System provides a unique payment identification
Satellite API - Migrating to new API
The previous Satellite API has been updated so that both the Fusion Satellite API and Fusion Cloud API share a common data model.
The following is a guide for updating a previous integration to the new data model.
Intent Request
| Old Field | New Field | Notes |
|---|---|---|
| TransType | PaymentData.PaymentType | |
| Amount | PaymentTransaction.AmountsReq.RequestedAmount | Amount was represented as an integer 'cents' in the previous API, where the new API RequestedAmount is represented as decimal dollar and cents |
| CashOut | PaymentTransaction.AmountsReq.CashBackAmount | CashOut was represented as an integer 'cents' in the previous API, where the new API CashBackAmount is represented as decimal dollar and cents |
| POS | ApplicationName | Set as extra data in the intent, not part of the Request json object |
| Source | SoftwareVersion | Only include the software version, not the POS name. Set as extra data in the intent, not part of the Request json object |
Intent Response
| Old Field | New Field | Notes |
|---|---|---|
| TransState | Response.Result | |
| TransID | POIData.POITransactionID.TransactionID | |
| TerminalID | PaymentResult.PaymentAcquirerData.AcquirerPOIID | |
| PAN | PaymentResult.PaymentInstrumentData.CardData.MaskedPAN | |
| Totalamount | PaymentResult.AmountsResp.AuthorizedAmount | Totalamount was represented as an integer 'cents' in the previous API, where the new API AuthorizedAmount is represented as decimal dollar and cents. Note the may not match AuthorizedAmount may not match the RequestedAmount. If implementing tipping or surcharge, the POS should also check for TipAmount and SurchargeAmount. |
| STAN | PaymentResult.PaymentAcquirerData.STAN | |
| AcqRRN | PaymentResult.PaymentAcquirerData.RRN | |
| TransDateTime | POIData.POITransactionID.TimeStamp | |
| EntryMode | PaymentResult.PaymentInstrumentData.CardData.EntryMode | |
| MerchantID | PaymentResult.PaymentAcquirerData.MerchantID | |
| HostErrorCode | PaymentResult.PaymentAcquirerData.ResponseCode | |
| TokenValue | PaymentResult.PaymentInstrumentData.PaymentToken.TokenValue |
Terminal configuration
Enable access to the home screen
In a production environment a terminal will typically be locked to the payment application, however in development and test it is useful to enable access to the home screen.
- In the Satellite payment app, tap the settings icon (⚙)
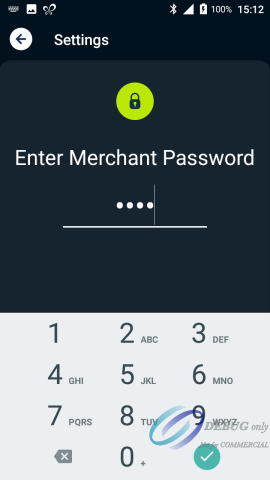
- Enter
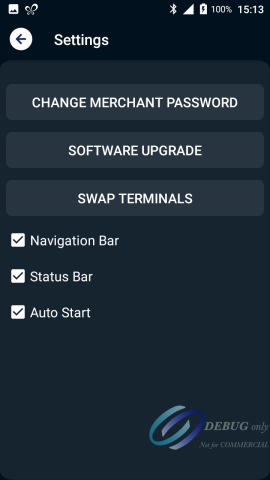
0000as the merchant password and ensure the following are ticked- Navigation bar
- Status Bar
- Tap the back icon (⬅)
- Hit the "home" button on the terminal to view the home page
Configure terminal environment
Your development terminal will be conncted to the UAT environment, which is the correct environment for testing.
To confirm or change the environment:
- Launch the Satellite payment app
- Tap the settings icon (⚙)
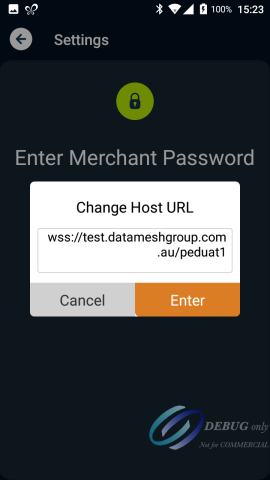
- Enter 8801 as the merchant password
- You'll be presented with a "Change Host URL" dialog
- Ensure the URL is
wss://test.datameshgroup.com.au/peduat1and tap Enter
- Restart the Satellite payment app
- Tap the task switcher button
- Close the Satellite payment app
- Launch the Satellite payment app again
Update settings
The terminal will periodically connect to the host and download updated settings.
To force a settings update:
- Make sure that your terminal has internet/mobile data connection
- Launch the Satellite payment app
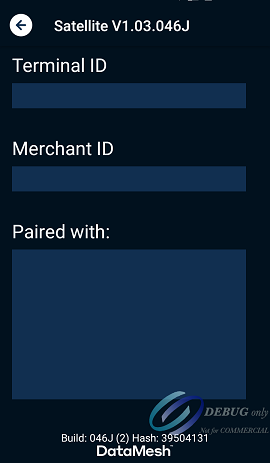
- Tap the "info" icon (ⓘ) at the top of the screen

- The terminal will update settings from the host
- Then current software version, terminal ID, merchant ID, and the list of POS paired with the terminal will be displayed on the screen
Update software
The terminal will periodically connect to the host and update to the configured software version.
To force a software update:
- Launch the Satellite payment app
- Tap the settings icon (⚙) at the top of the screen
- Enter
0000as the merchant password - Select the
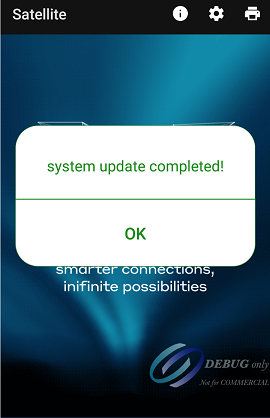
SOFTWARE UPGRADEoption and selectYESon the confirmation dialog - The software will be downloaded, and Satellite will restart
Update firmware
Before updating the terminal firmware, please contact the DataMesh Integration Team at integrations@datameshgroup.com to confirm that your terminal setting has been configured with the correct firmware version.
To initiate a firmware update
-
Confirm with DataMesh if the terminal firmware update is required. If the update is required, confirm with DataMesh that the terminal's firmware configuration has been set correctly
-
Set Terminal Display
Sleepsettings toNever -
Launch the Satellite payment app
-
Tap the settings icon (⚙) at the top of the screen
-
Enter
51201202as the merchant password -
Select
YESon the Download/Install Firmware confirmation dialog -
The firmware will then be downloaded
-
Please wait for a few minutes for the terminal to install the update and reboot multiple times, as required
-
Once the firmware update is complete, the terminal will reboot and the Satellite application will be launched
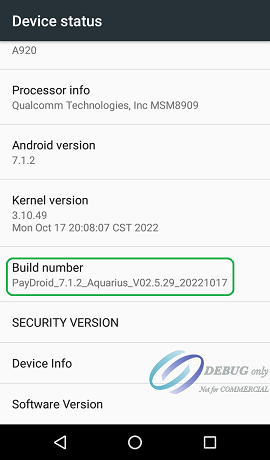
PAX - Firmware Version
Please refer to the Build number field of the Device status for the Firmware version.
Checking Wi-Fi connection
To check Wi-FI connection status at any time:
- Swipe down from the top of the screen to open the notification shade
- Swipe down again to expand the notification shade
- Top left icon will be your Wi-Fi status and connected access point
QR code pairing
To pair your Sale System through QR code:
- your Sale System must support QR code pairing
- your Satellite payment app Software Version must be at least 46J.
- The Software Version can be found at the top portion of Satellite's info screen.
- the Pair With POS option must be enabled on your Satellite payment app
If you are unable to see the Pair With POS option on your Satellite payment app, please contact the DataMesh Integration Team at integrations@datameshgroup.com.
- Launch your Sale System and access the option to display the QR code for pairing
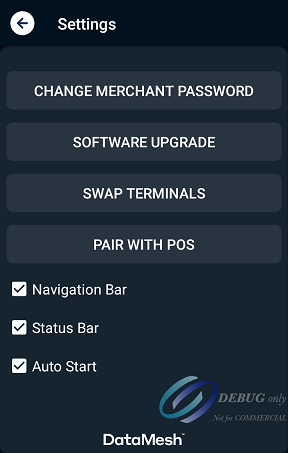
- In the Satellite payment app, tap the settings icon (⚙)
- Enter
0000as the merchant password - Tap the
Pair With POSoption - Scan the pairing QR code displayed by your Sale System
- After the pairing QR code has been scanned, follow the instructions on the Satellite payment app
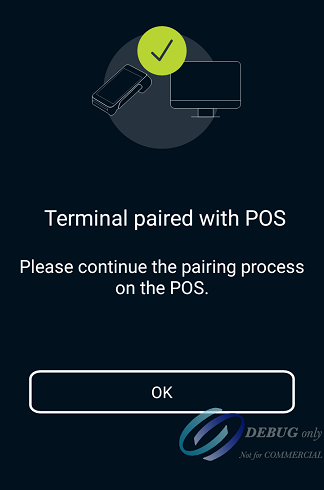
Pairing Result
- If the pairing was successful, you'll need to continue the pairing process in the Sale System
- If the pairing was not successful and the error displayed on the Satellite payment app starts with:
- POS Config Error
- Please contact your Sale System provider and inform them about the error.
- Terminal Config Error (and all other errors)
- Please contact the DataMesh Integrations team at integrations@datameshgroup.com.
- POS Config Error
Android Debug Bridge (ADB)
This section is only applicable to debug development POI terminals.
To execute ADB commands, download the Android SDK Platform Tools:
- If you have not done this previously, download the standalone Android SDK Platform Tools package:
-
Extract the contents of the downloaded Zip file into an easily accessible folder (e.g. C:\Android-Tools).
-
Open the File Explorer and browse to where you extracted the contents of the Zip file and copy the full path.

This path will also be the location of your ADB log file.
-
Use a USB cable to connect your POI Terminal to your PC.
-
Make sure that your POI Terminal is the only Android device connected to your PC.
-
Open the Command Prompt (Windows) or Terminal (macOS/Linux).
-
Navigate to the location where you extracted the contents of the Zip file.
-
Verify the POI Terminal connection by typing the following command and pressing Enter:
adb devices
This command lists all connected Android devices. Make sure your POI Terminal is listed, and its status is “device.”
If not, ensure USB debugging is enabled and that your POI Terminal is connected properly.

Device Logs
During development, DataMesh may request device logs from your development POI Terminal using the Android Debug Bridge (ADB).
To capture logs from your POI Terminal, please refer to Steps 1 to 8 in the Android Debug Bridge section and then, proceed with the steps listed below.
- If you see your POI Terminal's serial number and its status is device (when running the adb devices command), run the following command (in the same Command Prompt (Windows) or Terminal (macOS/Linux) window where you executed the adb devices command) to start capturing logs:
adb logcat > android-logs.txt
This command tells ADB to capture the device logs and save them to a file named "android-logs.txt” in the current directory.
- Once logging has been enabled, you may now start performing your specific test case(s).
- Once you’ve replicated the issue or captured enough data, stop capturing logs by pressing Ctrl + C in the Command Prompt or Terminal window where ADB is running.

- Open the File Explorer and browse to the location of your ADB log file.
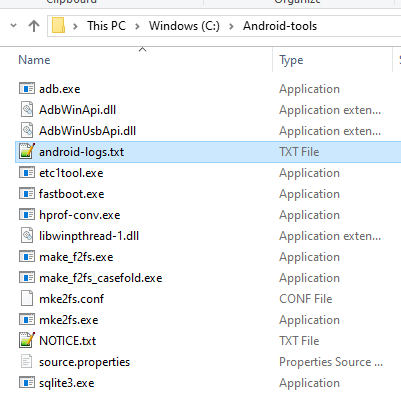
- Zip (if the size is too big), copy, and share the ADB log file to DataMesh.
Loading a custom APK using the Android Debug Bridge (ADB)
To install the Satellite APK (or a custom APK) on your development POI Terminal using the Android Debug Bridge (ADB), please refer to Steps 1 to 8 in the Android Debug Bridge section and then, proceed with the steps listed below.
- If you see your POI Terminal's serial number and its status is device (when running the adb devices command), run the following command (in the same Command Prompt (Windows) or Terminal (macOS/Linux) window where you executed the adb devices command) to install the Satellite APK or custom APK:
adb -s DeviceSerialNumber install "APKFullFilePath"
- Replace:
- DeviceSerialNumber with your POI Terminal's serial number listed in the adb devices result
- APKFullFilePath with the full APK file path (e.g. C:\Android-tools\Satellite.apk)
- Please wait until installation is complete before accessing the installed application on your POI Terminal.
- Only if you're installing the Satellite APK and after the Satellite APK has been installed successfully:
- Launch the Satellite application
- Follow the prompts
- Tap the "info" icon (ⓘ) at the top of the Satellite screen
- Restart your terminal
PAX
Connect to Wi-Fi
The terminal can be connected to Wi-Fi where cellular access isn't avaiable.
-
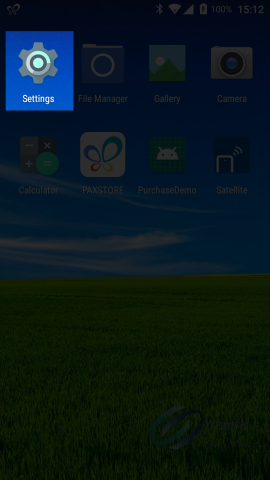
Press the Home button
-
Launch the "Settings" app (⚙icon)
-
If it asks for a password, enter
pax9876@@- if this doesn't work, please trypax9876or9876 -
Select the Wi-Fi option and tap the
Ontoggle switch - Wi-Fi is enabled when the toggle switch is green -
Choose your Wi-Fi network and enter the password
-
You should see your Wi-Fi network with a "Connected" status underneath
Loading a custom APK
For Fusion Satellite integrations, the DataMesh debug development POI terminals are configured to allow loading of custom APKs.
If Satellite was installed previously on your debug development POI terminal, you'll need to unistall the old version before installing the updated version of Satellite.
Uninstall previous version of Satellite
- Only on a debug development POI terminal and if you require to install a different version of Satellite, you'll need to uninstall any previous version of Satellite:
-
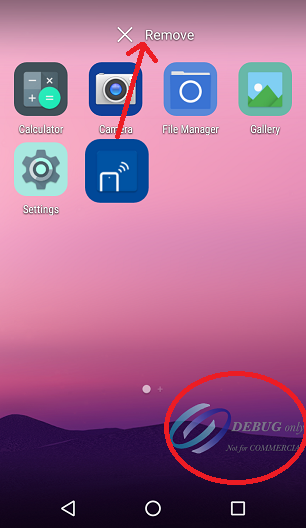
Long press on the Satellite application and drag it to Remove
-
There are two methods for installing an APK:
Copy the APK to the terminal
- Connect the USB port on the side of the POI Terminal to your PC
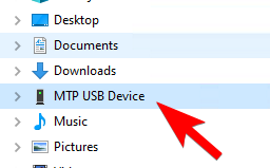
- The terminal will appear as "MTP USB Device" (or "A920" or "A930") in the PC file manager
- Navigate to "MTP USB Device", and copy your APK to the terminal "Download" directory
- On the terminal, launch "File Manager" and navigate to the "Download" directory
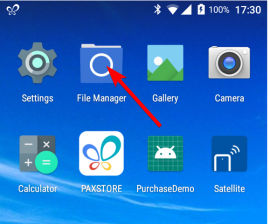
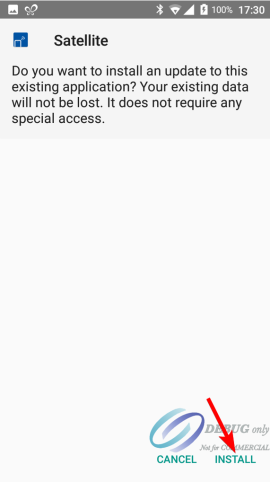
- Tap your APK version and accept the install.
Install using the Android Debug Bridge (ADB)
- Please refer to the Loading a custom APK using the Android Debug Bridge (ADB) section.
Ingenico
Connect to Wi-Fi
The terminal can be connected to Wi-Fi where cellular access isn't avaiable.
- Press the Home button
- Launch the "Settings" app (⚙icon)
- If it asks for a password, enter
350000 - Select Network & Internet option and then select Wi-Fi
- Tap the
Use Wi-Fitoggle switch - Wi-Fi is enabled when the toggle switch is green - Choose your Wi-Fi network and enter the password
- You should see your Wi-Fi network with a "Connected" status underneath
Loading a custom APK
For Fusion Satellite integrations, the DataMesh debug development POI terminals are configured to allow loading of custom APKs.
If Satellite was installed previously on your debug development POI terminal, you'll need to unistall the old version before installing the updated version of Satellite.
Uninstall previous version of Satellite
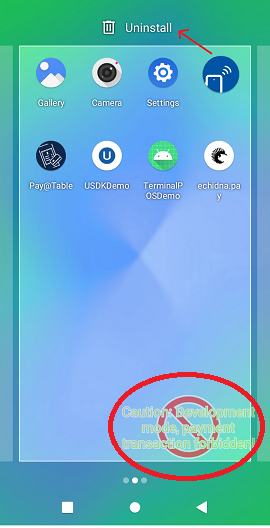
- Only on a debug development POI terminal, uninstall any previous version of Satellite:
-
Long press on the Satellite application and drag it to Uninstall
-
There are two methods for installing an APK:
Install through AxToolkit
- Uninstall Satellite.
- Connect the USB port on the side of the POI Terminal to your PC
- Install AxToolkit (Contact the DataMesh Integrations team at integrations@datameshgroup.com if you don't have an AxToolkit)
- Open the AxToolkit.
- Access Tools > Software Manager > Run
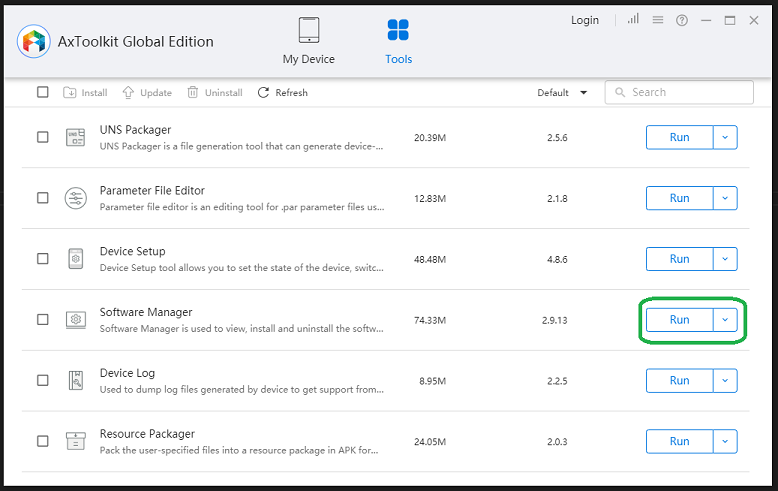
Appendthe file that you want to be installed and click onStart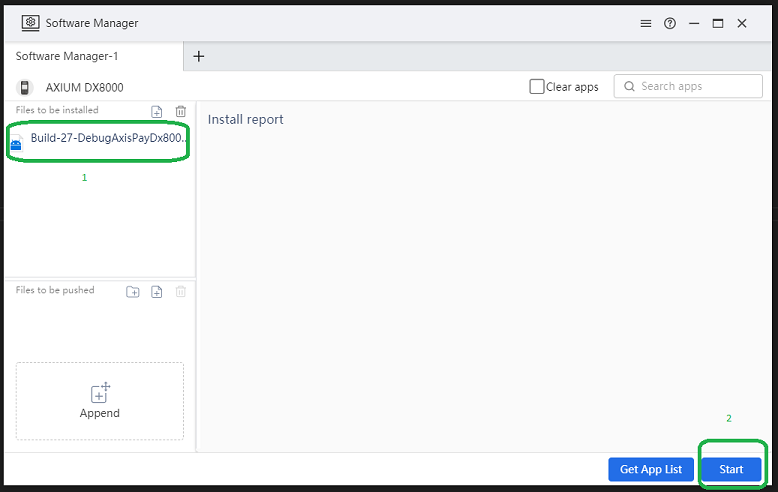
- After the Satellite APK has been installed successfully:
- Launch the Satellite application
- Follow the prompts
- Tap the "info" icon (ⓘ) at the top of the screen
- Restart your terminal
Install using the Android Debug Bridge (ADB)
- Please refer to the Loading a custom APK using the Android Debug Bridge (ADB) section.
Accessing the terminal file(s)
In certain scenarios, you might need to access files from the terminal (e.g. screenshots)
Access the terminal file(s)
- Press the Home button
- Launch the "Settings" app (⚙icon)
- If it asks for a password, enter
350000 - Select the Connected devices option and then select USB
- Tap the File Transfer under the USE USB FOR section
- Then, tap on the back button
- Connect the USB port on the side of the POI Terminal to your PC
- The terminal will appear as DX8000 in the PC file manager
- Navigate to DX8000 > Internal shared storage and access/copy the file that you require from the terminal to your PC

Device Renewal
Development mode on Ingenico devices has a 3-month expiration.
Once your development device has expired or when required, you will need to request for another signed Auth file to continue using it.
Please contact the DataMesh Integrations team at integrations@datameshgroup.com to request for :
- your device's Auth file and
- the AxToolkit installer, if you don't have it.
Please provide your terminal’s Serial Number when making a request.
Install the Auth File via AxToolKit
Once you’ve received the Auth File from DataMesh, please install it using the instructions below:
-
Install the AxToolkit.
-
Make sure that your Ingenico device is connected to your PC but is turned OFF.
-
Open the AxToolkit.
-
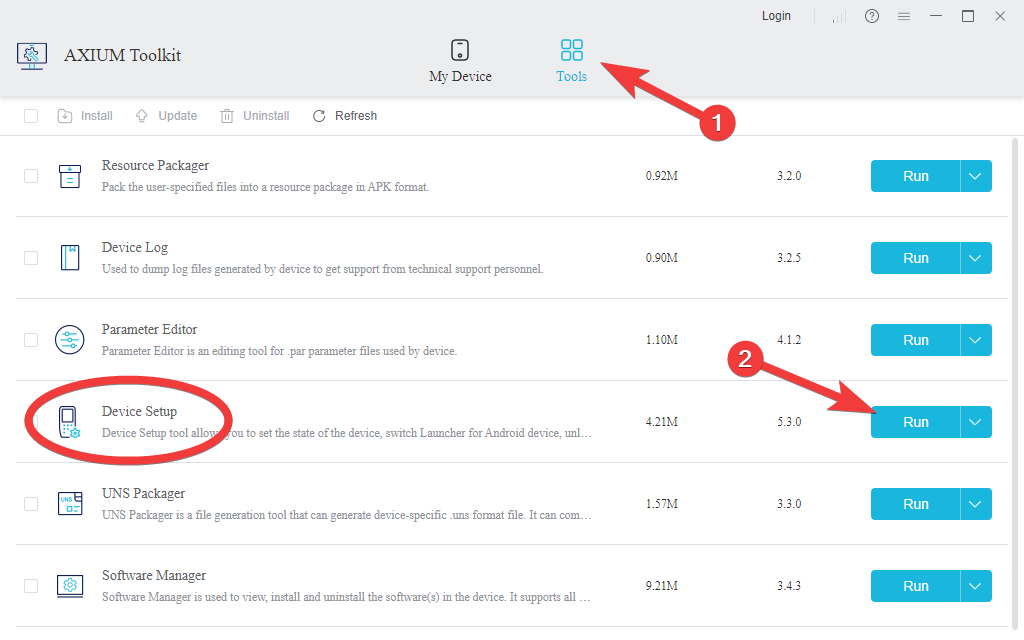
Navigate to the Tools section, find Device Setup and click Run
-
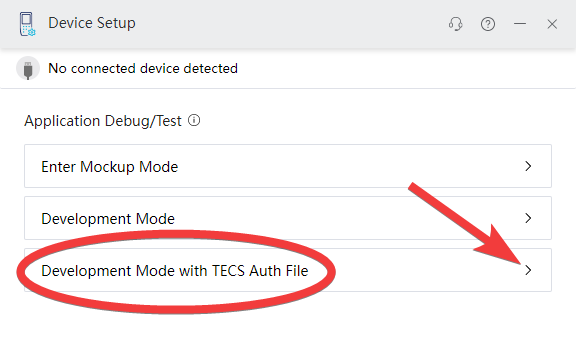
Expand Development Mode with TECS Auth File
-
Turn ON your Ingenico device.
-
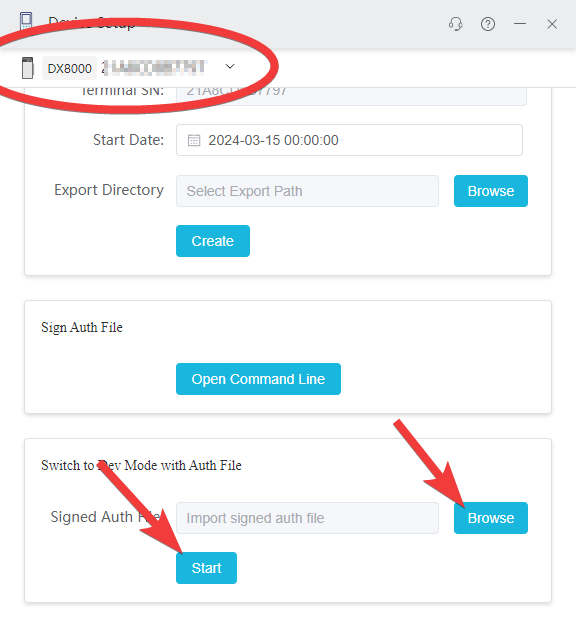
After ~60 seconds, once Device Setup has detected your device (indicated at the top of the window)
-
Scroll to the Switch to Dev Mode with Auth File, click on Browse and import the Auth File that DataMesh has provided, and click Start
-
Wait for the device to be refreshed (~60 seconds)
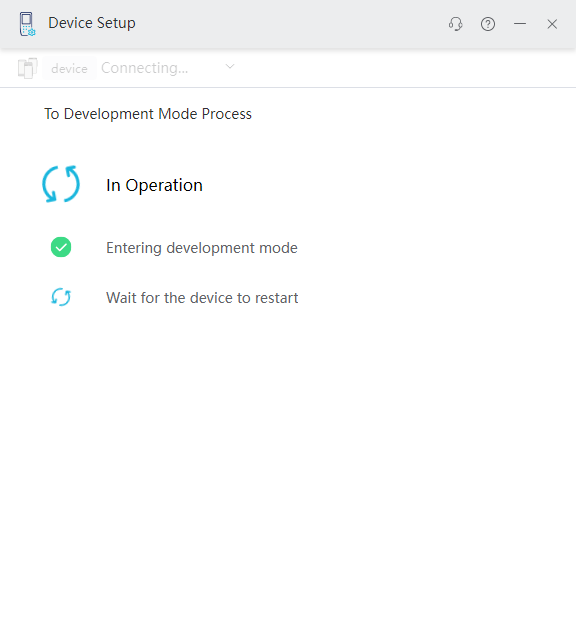
-
Once update has been successful, you should see a Development Mode text/logo on the main screen

Change log
2024-02-01
- Added Perform a balance inquiry (events mode)
- Added Fusion App endpoints for balance inquiry and stored value requests
- Updated Fusion App payments endpoints
2024-01-18
- Added Getting started → Product level blocking (PLB)
- Added Getting started → Restricted payment brands
- Updated AllowedPaymentBrand
2024-02-19
- Updated AllowedPaymentBrands references to AllowedPaymentBrand
2024-04-11
- Added Device Renewal
2024-05-06
- Added CurrentBalance and Currency to PaymentResponse
2024-05-20
- Added Device Logs
2024-08-23
- Added references to USB Connection under Fusion App sections